How to Make a Mouthwatering Pot Roast Pie
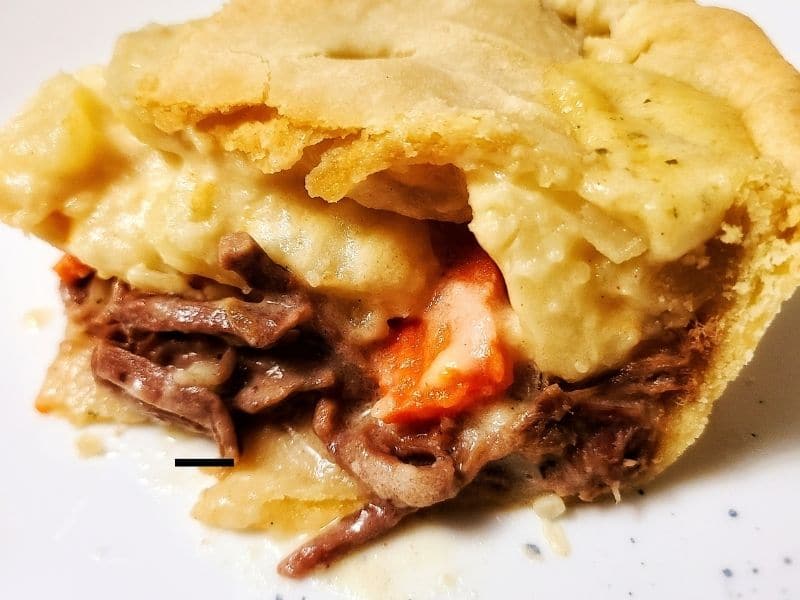
I love a good pot roast. What I love more than a good pot roast is a flavorful, creamy gravy. A good gravy can turn the driest of dishes into the most desirable of dishes. My mouthwatering pot roast pie encompasses everything you love about some good ole meat and potatoes, smothered in gravy and gifted in a flaky, buttery crust.
I must warn you—this mouthwatering pot roast pie takes dedication. You’ve got to really want it! Quitting halfway through is not an option.
I came up with this idea from a similar recipe I read a while back. The difference is that the author used leftovers from their meal and threw it in a pie crust.
My first thought was, “Leftovers? From pot roast and potatoes? That’ll never happen around here.” And then my recipe for the whole thing was born. This entire recipe, minus making it into a pie, would feed us for one meal and leftovers for Joe and me for a day, maybe two. After layering it up into a pie, it is literally two meals for the entire family. It feels so good to stretch this meal in an inexpensive way!
Essentially, you’ll be making an entire pot roast meal, pour it into a pie crust (strategically, of course), and bake it for about an hour.
Time, patience, and love. That is what you’re putting into this mouthwatering pot roast pie, and it is worth every minute of it. You’ll taste it in every bite!
So let’s dive in!
Reading further, you will find my more detailed instructions with a few of my favorite kitchen hacks here and there. If you are just here for the recipe, scroll down towards the bottom of this post, and there it will be—or click the jump to recipe button!
Cooking the Pot Roast
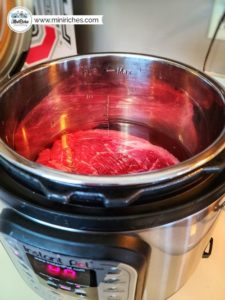
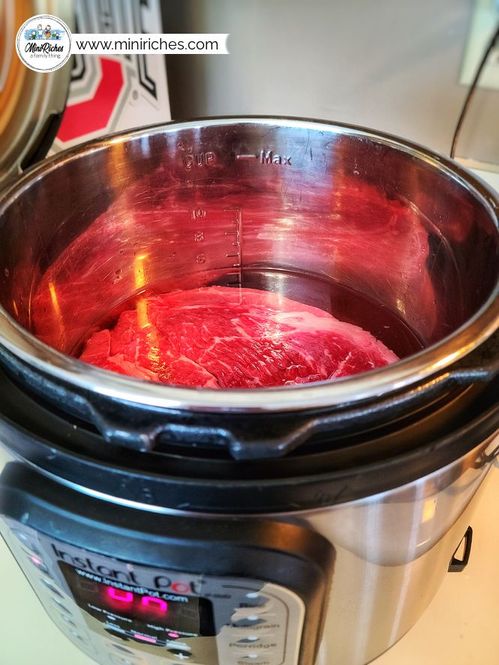
In this recipe, I used 2-3lbs of roast depending on the package I buy. If you are using a fresh cut of meat, place it in your Instant Pot with 2 cups of water and a teaspoon of salt. You’ll select the meat/stew button and increase the time to 60 minutes. Your roast will be done cooking after much less time than that, but it will not fall apart. You want to cook it long enough so that it will melt in your mouth. You can use a natural or quick release.
Making this meal is an all-day project for me. Once my meat is done cooking and falls apart, I tend to leave it in my Instant Pot on warm until I’m ready to use it—which could be hours later. The wait doesn’t impact the outcome of our meal at all. It is still AH-MAZING if I take all day to put it together or knock it out in a couple of hours.
If you are using a frozen pot roast, I suggest pressure cooking the roast for at least 75 minutes using the same settings.
Making Your Pie Crust
Bonus tip! When you take the roast out of the freezer, place two sticks of butter in your freezer to use for your pie crust. You’ll be glad you did!
Once the butter has been in the freezer for 30 minutes or so, I get started on my crust.
Kitchen Hack #1: The key to making the perfect pie crust is to use frozen butter and a cheese grater. I’ve read many recipes that tell you to chuck the butter and use a pastry cutter to cut the butter into the flour. I prefer to use a cheese grater. The small shreds of butter mix in with the flour with ease and help create that preferred flakiness. You can use the big holes or tiny holes on your cheese grater. I’ve used both and have found no difference in the outcome of the pie.
Kitchen Hack #2: Grate half of two sticks of butter to get the full 8 tbsps. To save my fingers from slipping and getting grated into the dough, I grate half of one stick of butter and then grate half of another stick of frozen butter. This way, I can keep a good grip on each stick without risking injury to my digits.
Once you’ve grated the butter into the flour, mix it with a fork by hand to cover all those tiny shreds of butter with flour. Then, add in the Crisco and mash it into the flour and butter.
One tablespoon at a time, pour in the cold water and mix it with a fork. After it is pretty well mixed, I use my hands to finish kneading it together.
Separate the dough into two parts, one a little larger than the other. One dough ball will be used as the pie shell and the other as the pie’s top. Wrap each ball of dough in plastic wrap, and place in the refrigerator for later. You can also make the pie dough and immediately use it.
Creating Creamy Potatoes
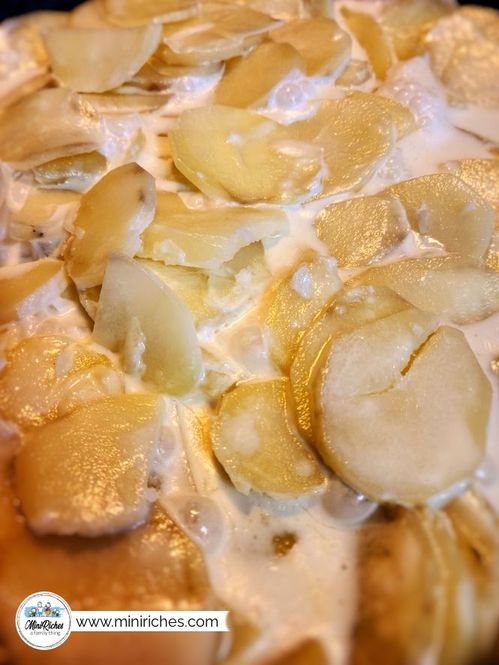
Next, I get started on my creamy potatoes. Before slicing and dicing, get your milk/cream mixture in a deep skillet and turn it on med-low. Toss in a nice helping of garlic (a tablespoon) and let the flavors merge while you ready the spuds.
You can wash the potatoes or peel them—either works fine. I prefer to peel them. I use one potato per family member and then add one or two more for good measure. Roughly eight medium-sized Idaho potatoes do for our family. After peeling and cleaning the potatoes, I cut them into 1/8 to ¼ inch thin slices.
The exact thinness isn’t important. Shoot for making them thinner than a 1/2 inch. Rinse the slices again to take off any excess starch and place the potatoes in the warming skillet of milk.
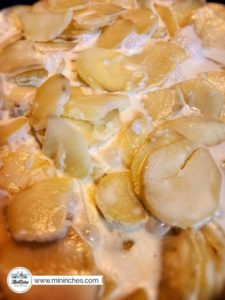
Set your burner to medium, bring to a boil, and then reduce the heat to a simmer. Occasionally stir the potatoes. Stirring will ensure the milk does not scald and the potatoes do not burn to the bottom of the skillet. After the potatoes have cooked for around 10 minutes, add in the parmesan and seasonings.
Cooking Your Carrots
While the potatoes simmer to a creamy, soft, deliciousness, move on to prepping your carrots. Three of our kids are not cooked carrot fans, so I add one whole carrot for each of them and 2-3 for everyone else that does like cooked carrots. Then I add a couple more for good measure.
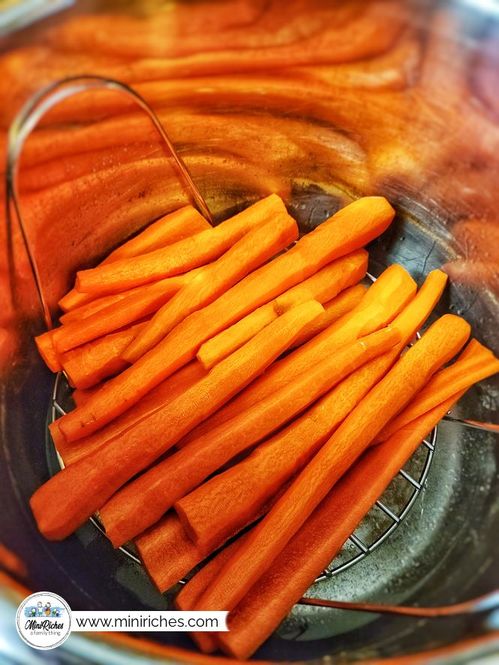
Peel and rinse your carrots and cut them into thick sticks. You will be using your Instant Pot pressure cooker and trivet to steam the carrots, so you don’t want to chop them up too small. Cut them in half, then cut them again longways. They will now lay nicely on top of your trivet.
After you’ve prepared your carrots, remove the cooked roast from your pot and pour the liquid into another pot or measuring cup. I like using measuring cups because then I know how much broth I have for making gravy.
Pour a cup of water into the instant pot, place the trivet, and lay the carrots on top of the trivet. Select the steam function on the instant pot and set the time to 5 minutes. If you have many more carrots than I suggested or pretty thick carrots, then set your timer for 7-8 minutes.
Great Gravy Goodness
While your carrots are steaming, your potatoes are simmering, and your meat is resting, move on to the gravy. In a medium-sized pot, melt your butter on medium-low heat and whisk in the flour once the butter melts.
Kitchen Hack #3: The secret to good gravy is a good roux. Not enough, and your gravy is too runny. Too much, and your gravy will become the consistency of pudding.
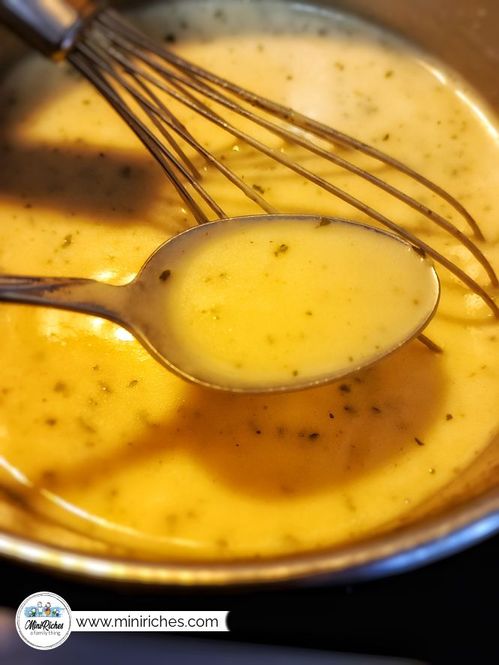
Let the roux brown for a minute and add in one cup of beef broth at a time. Adding one at a time gives you a chance to whisk it together and not have lumps. It also helps you gauge if you need more liquid or not. I add a total of 3 cups of broth and 1 to 2 cups of milk.
Whisk, whisk, whisk, my friends! Turn your gravy down to low and whisk in your spices. Add or take away spices as you desire. The ones I use in this recipe is the combination that we enjoy. About half of the gravy you will use in the pie. The other half you may use to pour over your meal or leftovers.
You are SO CLOSE to the end!
Roll Out the Dough
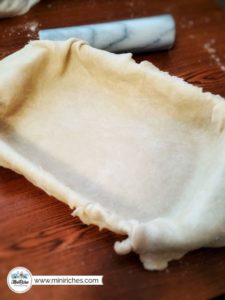
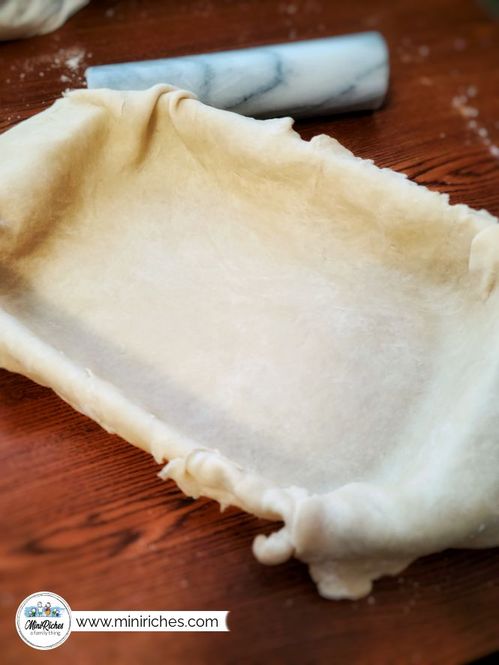
Get out the pie dough that you made at the beginning of the recipe. Generously flour a clean surface and roll out one dough ball into approximately an 11”x15” rectangle. You can make it slightly longer, but I wouldn’t make it any smaller than this because it needs to come up the sides of your 9”x13” pan.
Assemble Your Mouthwatering Pot Roast Pie
Now comes the fun part! Once you’ve transferred your pie dough into your 9”x13” pan, you can begin layering your pot roast pie!
WOOHOO!!!
Preheat your oven to 400 degrees.
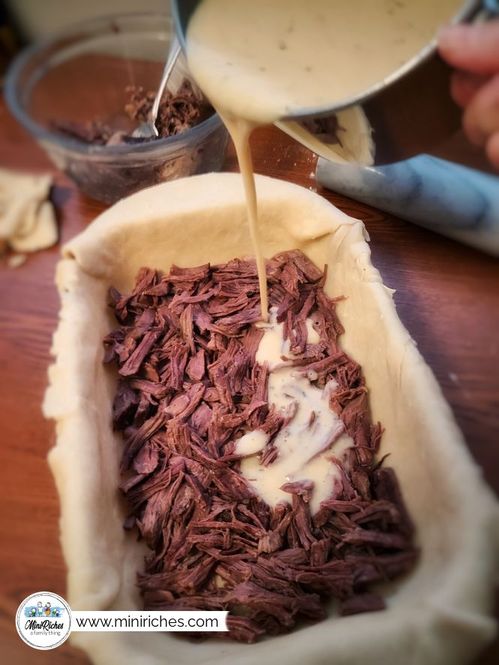
By now, your roast will have cooled off enough to handle. I shred the cooked roast by hand so I can pull out any chunks of fat. You can use your stand mixer and paddle to shred the roast or two forks to pull it apart. Whatever floats your boat!
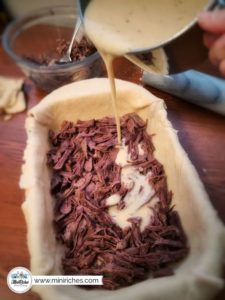
Create a shredded roast layer on the bottom, and then pour 2 cups of gravy over it. Honestly, I eyeball how much is needed. You may need a little more, and that is ok. You want the gravy to lay over the roast, not have your roast swimming in it.
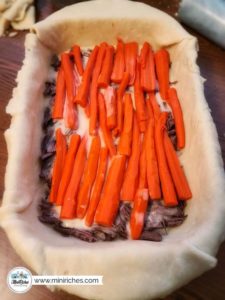
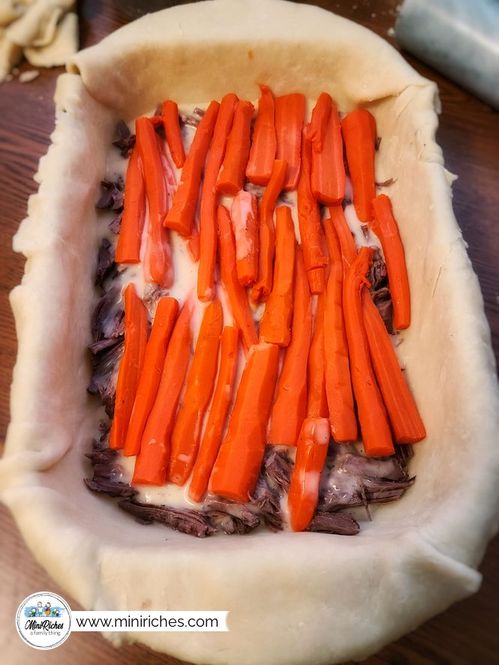
Next, you will layer your carrots on top of the gravy and roast.
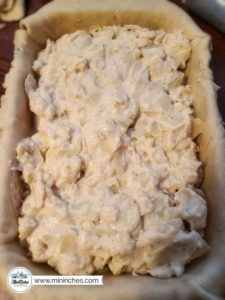
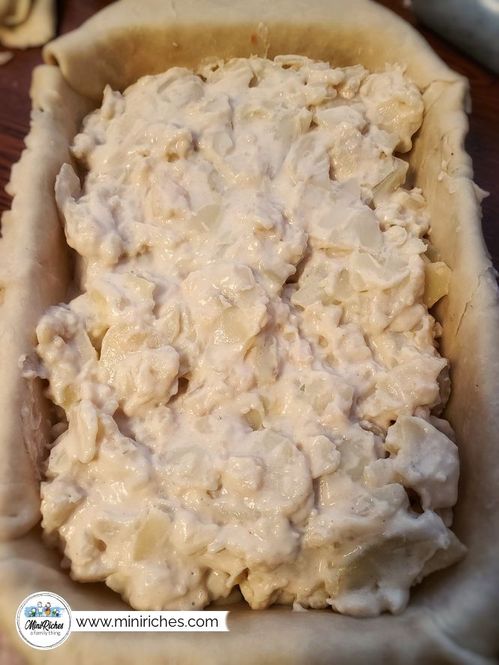
Follow with all of the soft, creamy potatoes and cream sauce.
Final Steps
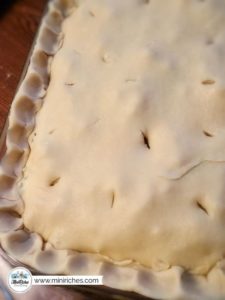
After I have layered my pie together, I roll out my last dough ball. This will form the top layer of my pie. Lay it overtop the potatoes, trim and crimp the edges, and place several slits in it to let the steam escape.
As you can see below, I am not a master-crimper. I’m certain that with more practice, I’ll get better at it. I’m sure my family members are glad to read that. More practice means more pie baking!
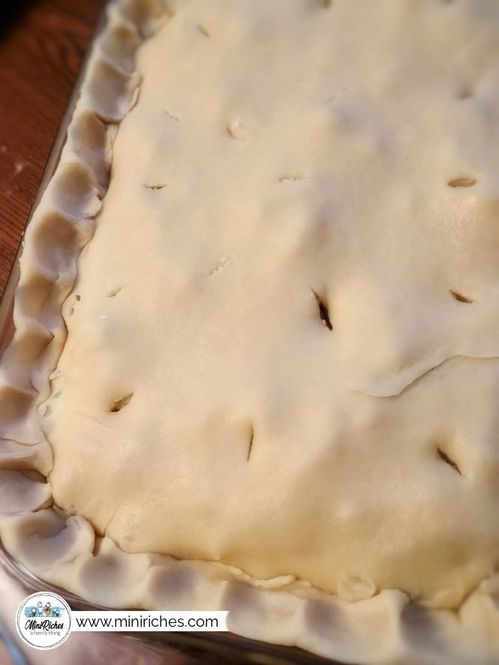
Once your pie is ready for the oven, you can brush the top with a little milk to help it golden up in color. It’s not necessary, though.
Kitchen Hack #4: Before putting your pie in the oven, measure out a piece of aluminum foil to the full size of your 9”x13” pan. Fold it in half and cut out a rectangle, leaving about 2 inches on each side. After your first 20 minutes of baking, you will use it to put over your pie edges to protect your crust from burning.
Shake and Bake
Raise your hands in the air and shake them like you just don’t care because you are ready to bake your pie!
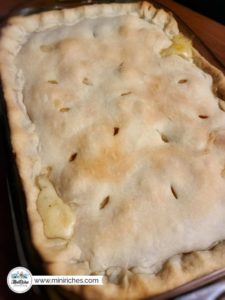
Bake your pie at 400 degrees. After 20 minutes, remove your pie from the oven and place foil around the edges to prevent burning (see kitchen-hack #4 above). Reduce your heat to 375 degrees and place the pie back in the oven to finish baking for another 40 minutes.
Once finished baking, remove your pot roast pie and let sit for 10 minutes or so before cutting into it and serving.
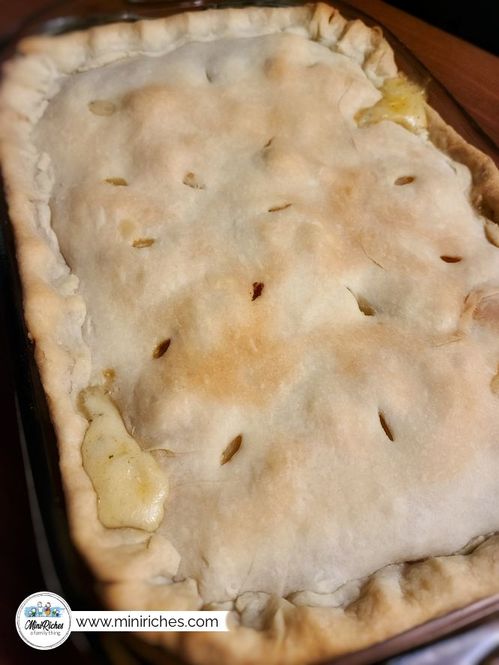
Kitchen Hack #5: Let your pie rest in a cold place for 10 minutes. I usually make this pie in the colder months, so our garage is the perfect place to let the pie cool off before serving.
Letting it rest in a cold place will also make serving it up much easier. If you cut into it while it is still piping hot, the pie’s insides will flood out. By letting the pie cool off, you’re giving it a chance to stick together by the time you serve it.
Well friends, I told you this meal would take dedication. My final kitchen hack is to clean up as you go! You will use several dishes and utensils, and the mess can build up fast. If you clean up what you use before it’s time to eat, then supper clean up will be a breeze. You will appreciate it being a breeze since you just put in so much hard work making such a delicious, mouthwatering pot roast pie. Enjoy!
EQUIPMENT
- Instant Pot
INGREDIENTS
Buttery Pie Crust
- 8 tbsp butter (place in freezer before beginning recipe)
- ½ cup Crisco
- 3 cups flour
- 8-9 tbsp cold water
Perfect Pot Roast Pie
- 2-3 lbs chuck roast
- 3 cups water
- 1 tsp salt
- 10 carrots
- 8 medium potatoes (sliced thin)
- 1 ½ cups cream
- 1 ½ cups whole milk
- ½ cup parmesan cheese (grated)
- 1 tsp salt
- 1 tbsp garlic (minced)
Great Gravy Goodness
- 4 tbsp butter
- 4 tbsp flour
- 3 cups broth
- 1 cup whole milk
- ½ tsp parsley
- ½ tsp onion powder
- ½ tsp garlic powder
- ½ tsp creole
- ½ tsp pepper
- ½ tsp salt
INSTRUCTIONS
- Place the roast and water in your Instant Pot. Sprinkle with salt—close and seal lid. Make sure the vent is also closed. Select manual and increase time to 60 minutes.
- Make the pie dough. Add flour in a separate bowl. Take one stick of butter out of the freezer and grate half of it into the flour. Remove the other butter stick from the freezer and grate half of it into the flour. Stir the flour and butter shavings together.
- Add Crisco to the flour and butter. Using a fork or pastry cutter, cut in the Crisco. Once combined, add in 8 tablespoons of cold water. Cut in until well combined, then use your hands to knead the dough.
- Once the dough has come together, separate it into two balls, one slightly bigger than the other. Wrap in plastic wrap and place in the refrigerator to chill.
- Using a deep skillet, pour in milk and cream to begin the potatoes. Turn the skillet to medium-low heat. Add garlic and stir.
- Prepare the potatoes for the skillet. Clean and thinly slice potatoes. Rinse potatoes, then transfer to the skillet.
- Turn your burner up to medium and bring potatoes and sauce to a boil. Once boiling, reduce heat and let simmer for 20 minutes. Occasionally stir to prevent scalding and burning.
- Halfway through the potatoes cooking, add parmesan and salt.
- Remove roast from Instant Pot and let rest. Pour broth into measuring cups or another bowl.
- Peel and rinse carrots. Cut into long sticks.
- Place trivet and one cup of water into the Instant Pot. Put carrots on the trivet. Close and seal the lid. Select the steam function and set it for 5 minutes.
- Using a medium-sized pot, place the pot on a burner and set it to medium-low heat. Melt 4 tablespoons of butter. Once melted, add 4 tablespoons of flour. Whisk to combine and let brown for one minute.
- Whisk in one cup of broth at a time. Then, whisk in one cup of milk at a time. Season gravy and let simmer, stirring occasionally.
- Take the pie dough out of the refrigerator. Generously flour a clean surface and roll out the larger dough ball into approximately 11”x15” or slightly larger. Once rolled out, lay it into your 9”x13” glass pan.
- Preheat the oven to 400°.
- Assemble your pot roast pie. Shred your roast and place it into the pie. Pour 2 cups of gravy over shredded roast beef.
- Lay carrots over roast and gravy.
- Pour potatoes and sauce on top.
- Roll out the second ball of dough on a generously floured surface to approximately 9”x13” inches. Place it on top of the potatoes and trim and crimp the edges. Add 6 to 8 half-inch slits in the top of the pie crust to let the steam release during baking.
- Optional: Brush with milk to create a golden crust.
- Bake your mouthwatering pot roast pie for 20 minutes. After 20 minutes, cover edges with foil and reduce heat to 375°. Finish baking for 35 minutes.
- Once finished baking, remove from the oven and let rest for 10 minutes before serving. Serve with extra gravy if desired.

