How to Make Inexpensive and Easy Homemade Bread in 9 Steps
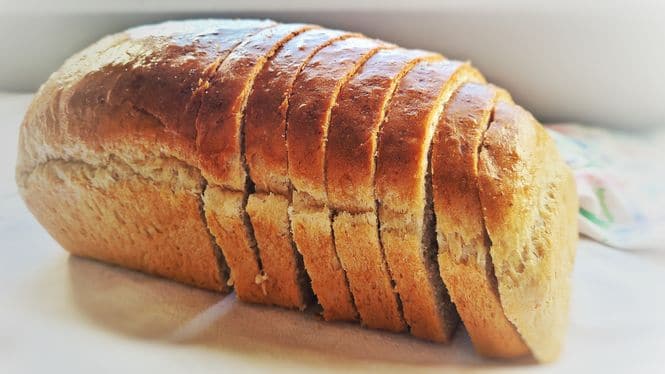
Have you ever had bread fresh from the oven or baked that same day? It’s like a little slice of heaven in your mouth. Fluffy, soft, and warm, simply scrumptious! It tastes like it took a lot of work, but would you believe it’s actually pretty easy to make?
One of our favorite children’s books series are the Mercy Watson books by Kate DiCamillo. Mercy is a pig, and the thing she loves most is toast with a great deal of butter. I didn’t know what Mercy knew until I found my new favorite, easy homemade bread recipe, toasted up a slice, and let a great deal of butter melt into those crunchy crevices. Yum, yum, and more yum!
This is an easy homemade bread recipe that is very forgiving. I’ve accidentally added a little too much water or flour a time or two. Once I realize what I did (which is when I see the dough isn’t looking quite right in the mixer), I can add more flour or water to smooth out my mistake. You can even roll this bad boy out, cover it in butter, cinnamon, and brown sugar, and roll it back up for a delicious cinnamon swirl bread!
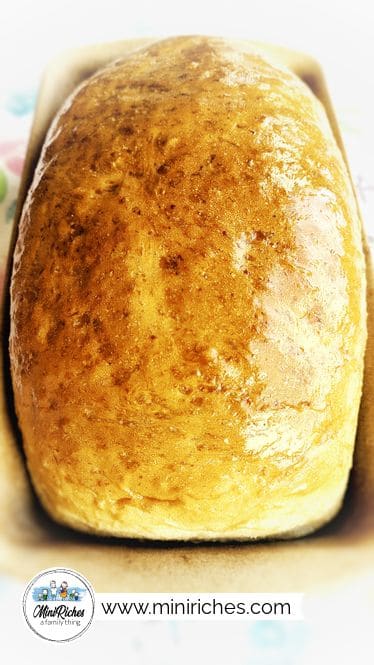
I like this recipe because it is simple and delicious and because I feel like it produces a more durable bread than other recipes. The oatmeal gives it an extra healthy kick without sacrificing flavor or texture, and it helps the bread withstand a knife full of peanut butter without falling apart at the first spread. Believe me, when I tell you that you wouldn’t know there was oatmeal in it had you not made the bread yourself!
“Why would you waste your time making bread when it is so cheap at the store?”
Here are my thoughts on that conundrum.
I Enjoy It
How many times do you lose yourself in parenthood and wonder if this is all you are anymore? Snap back from that by incorporating things YOU love into your daily life. Cooking for my family is not only my creative outlet, but also a labor of love. Both reasons are why I enjoy it so much. I hope that one day my kids will look back and be thankful for the lengths of love that I went to give them a home-cooked meal.
It Is a Great Activity to Do With All the Kids
What kid doesn’t love helping cook in the kitchen? It is an activity for all age groups. Older kids can learn a little math by measuring ingredients. Younger children love pouring each ingredient into the bowl. Everyone is mesmerized when watching the dough form as the mixer spins around and around! Use the opportunities you have to engage with your children, you only have them for a short period of time until they are grown adults. If you want some more kid-friendly activities, you can check out Joe’s post on 20 Super Fun Free Family Activities for a Happy Heart!
Less Preservatives
No, I’m not talking about apricot preserves. I’m talking about those unnecessary artificial extra ingredients used to keep bread fresher longer. I can’t get rid of everything that includes preservatives, GMO’s, or chemicals, but I can sure try! Making my own bread is one small step in a larger picture. As I learn more, I try to do better, and I hope you do too.
It IS Cheaper Than Store-Bought Bread!
When I make bread, I make two loaves at a time. Each loaf is smaller than one store-bought bread, but both loaves are more than one loaf of store-bought bread. On average, though, two loaves per week is plenty for our consumption needs—and we’re a family of 7.
Because we have a larger than average family, I try to shop in bulk. Who is our nearest buy-in-bulk store? Well, that would be Sam’s Club. I will spare you all the math I had to do to figure this out, but each loaf with this recipe comes to roughly $0.74. This recipe I’m sharing with you today makes two loaves, for a grand total of $1.48. If you’re really interested in math, you can find it at the end of this post.
Time is money, and at first, it was not cost-effective for me to make bread every week. Until I made time for it. Once I figured out how to work it into my schedule, baking bread became a breeze and worth my time.
My Kids Were in Love With Their Grandma’s Homemade Bread and I Couldn’t Let Her Show Me Up
I am kidding, a little, about this one. My grandmother would always give us a loaf of homemade bread during the week, or homemade pie or cookies—I’ll share those recipes later! She always had a smile on her face and joy in her heart when we were with her. When she’d give us her homemade goodies, I felt the love. I wanted to share that with my kids and my mother-in-law was two steps ahead of me.
My children thought my mother-in-law’s homemade bread was the next best thing to sliced cheese! Several years ago she began homemade bread making and was ready to help me get my hands wrist-deep in flour! After she helped me conquer my fears of baking bread, it was my turn to experiment and find the recipe I loved and could make whenever I wanted.
So that’s what I did. I tried SO MANY RECIPES from Pinterest. Buttermilk bread, cheap bread, and honey bread. Eventually, I used a cross between my mother-in-law’s favorite recipe and an oatmeal bread recipe to develop my easy homemade bread.
If you complete it all at once, this recipe will take you no more than 2 hours. Baking bread often takes 3+ hours, but I use instant dry yeast, and it does not need to be proofed, nor does your bread need to rise twice. A ten-minute rest and one hour rise are all you need. If you’re like me and do not have 2 hours to hang out in the kitchen, it could take longer. Your bread will still come out just as delicious as if you had two straight hours to complete it.
I share that it takes me longer than usual because it’s hard to run a circus and cook at the same time! While the kids are getting ready for school, I start the oatmeal. By the time I get back to it 2 hours later, I have to re-heat the oatmeal a little and then finish putting the ingredients together. Once it is in the loaf pans and rising, I will inevitably forget about it. It ends up rising for more than an hour, no more than two, though! Rising for longer than an hour does not benefit your bread. I once let my bread rise for over 2 hours, and it actually fell. It did not puff up like it usually does—it looked so sad!
No more sadness!
On to baking yourself and your family, some simply scrumptious, easy homemade bread!
EQUIPMENT
- Mixer (not required)
INGREDIENTS
- 2 1/2 cups water
- 1 cup oatmeal quick oats
- 2 tbsp butter salted sweet cream or dairy free
- 1/2 cup honey
- 2 1/4 tsp yeast instant dry
- 6 cups flour all-purpose
INSTRUCTIONS
- Bring your water to a boil. Once boiling, add oats and butter and remove from heat. Let rest for 15 minutes.
- Add honey and 1 cup of flour, then transfer to your stand mixing bowl. Note: Your oatmeal needs to be warm. Not super hot and not cold, but bath-water warm, to activate the yeast. If your oatmeal has cooled to room temp or lower, warm it up a little before continuing with the recipe.
- Pour in (not mix, just pour) 2 more cups of flour, then add in the yeast. Pour the remaining 3 cups of flour over the yeast.
- Bring your stand mixer up and start on the stir setting for 1-2 minutes. Starting on low will prevent your flour from puffing up all over the place. Once the ingredients start coming together, increase speed to setting 2 and let mix for 5-7 minutes. See troubleshooting notes at the end of this recipe if you don’t think the dough is coming together as it should. Note: If you do not have a stand mixer, stir your ingredients together, and pour onto a floured surface. Knead the dough for approximately 10 minutes.
- Once you’re done mixing, turn off your mixer and lower the bowl. Take your hook out of your dough, cover, and let rest for 10 minutes. I like to use a spatula and move the dough ball to the side so I can spray a little cooking oil on the bottom. This will ensure that when I’m ready to take the dough out of the bowl, it will easily come out without sticking to the bottom. While you have the cooking spray handy, spray your bread pans for an easy release once baking is finished.
- After resting for 10 minutes, place your dough ball onto a clean surface, and cut it in half. I like to use my spatula to press down the middle, then pull it apart into equal halves. Set one piece aside, and roll out one dough ball into a rectangle. Firmly begin tuck and rolling the top (the short side) into the dough to create a loaf and place it in your bread pan. Repeat with your other ball of dough.
- Set your loaves in a warm place, covered with a light cloth or paper towel (so buggies or lint do not stick to them while rising), and let rise for 1 hour.
- After an hour, preheat your oven to 350 degrees. Place loaves on center rack and bake for 35 minutes.
- Once finished baking, remove loaves from the oven, butter if desired, take the loaves out of the pan, and let cool on a cooling rack for a few hours.
THE YUMMY VIDEO
NOTES:
I like it when my dough ball comes together perfectly. That isn’t always the case, so you have to improvise a little to fix it. This is a forgiving recipe so a little too much water or flour isn’t going to ruin your loaf.
NUTRITION
Price Break Down
Flour
- 25lb bag of flour
- 83 cups per $6.50 bag
- 6 cups in the recipe
- $0.08 for 1 cup
- $0.48 for 6 cups
Fun Fact: I can make this recipe 13 times from one 25lb bag of flour, which is 26 loaves of bread.
Honey
- Two 40oz bottles at $13.00
- 1/2 cup in the recipe (4oz in 1/2 cup)
- $0.65 per 1/2 cup
Fun Fact: I can make this recipe 20 times from 2 bottles of honey, which is 40 loaves of bread.
Oatmeal
- Two 5lb packages at $9.00
- 50 cups of oatmeal in 10lbs
- 1 cup in the recipe
- $0.18 per cup
Fun Fact: There are 50 cups in a 10lb package of oatmeal. I can make this recipe 50 times, which is 100 loaves of bread from 10lbs of oatmeal.
Butter
- 4lb package at $8.28
- 128 tablespoons per 4lb package
- $0.06 per tablespoon
- 2 tablespoons in the recipe
- $0.12 per 2 tablespoons
Fun Fact: I can make this recipe 64 times from 4lbs of butter, which is 128 loaves of bread.
Instant Dy Yeast
- Two 1lb packages at $5.00
- 320 teaspoons per 2lbs of instant dry yeast
- $0.02 per teaspoon
- 2 ¼ teaspoons in the recipe
- $0.05 per 2 ¼ teaspoons
Fun Fact: There are approximately 320 total teaspoons in a 2lbs of instant dry yeast. I can make this recipe 142 times, which is 284 loaves of bread.
Add it all up and you get $1.48 per recipe—or $0.74 per loaf!

Great recipe. These pictures are looking good. Mouth-watering.
Thank you! There’s not much better than fresh, homemade bread!
Glad to see you guys started doing recipes, and there is a video too which makes it super easy to follow! The bread looks delish, I’d love to try it. I’ve been trying to become good at baking recently, lol! Homemade bread always brings back memories of the bread my grandma made. Back at the time it looked so simple watching grandma doing it, but now I see it’s really not easy to make everything come out right.
Thanks Kat! We are excited to make more videos and figure it all out.
There is just nothing better than the scent of fresh bread filling the house! A loaf never lasts long at our house, that’s for sure! What a great legacy to pass on to the next generation. 🙂
So true! I wish I could bake bread every day just for that reason.
I have to try this recepie, it looks great!
Some looks may be deceiving, but not these! You won’t be disappointed.
Great simple recipe! I never buy bread at the store anymore, I only make it at home! I love seeing other recipes and giving them a try. Thanks for the frugal recipe. 🙂
Another homemade bread baker, awesome! You’ll have to share your favorite recipe with me 🙂 I love my recipe, but I’m always open to bake other yummy recipes.
Yum! Those pictures have my mouth watering! Looks like an amazing homemade bread recipe!
Thanks Crystal! It is mouthwatering and pairs great with soups!
Thank you for sharing. Wow what a cost savings making your own bread!
I know right? Over the course of a year, depending on the kind of store-bought bread I would have purchased if I hadn’t made my own, I can save between $50-$100! Every little bit counts.